
The Charmed Cushion - a free pattern!
With everything going on in the world at the moment, I’ve been really loving smaller makes that I can finish quickly. It just feels so good to finish something right now!
With lots of people staying home right now with more spare time, I thought it was about time I shared a free pattern with you all! This is a super easy make that’s suitable for everyone, even beginners or (supervised) kids, and will add a colourful pop to any room guaranteed to make you smile.
Lets go!
Details
Finished size 17” x 17” - perfect for keeping an 18” cushion nice and plump!
Envelope style back so no buttons or zipper required
Block techniques
Half-Square Triangles (HSTs)
Quarter-Square Triangles (QSTs)
Materials
Charm pack or forty 5” squares from your stash (I used a Crescent charm pack by Sarah Watts of Ruby Star Society)
Plain fabric for the back - 18” x 11”
Lining fabric - one 20” x 20” piece and two 20” x 13” pieces
Binding/facing material - 40” strip (or two 20” strips)
Batting - one 20” x 20” piece and two 20” x 13” pieces
Thread (I prefer Aurifil cotton for piecing and quilting)
Making the blocks
Step 1
With right sides together, pair up 40 of your charm pack squares. Have some fun playing with different combinations to mix and match your fabrics!
Step 2
Make 40 Half-Square Triangles (HSTs) -
On one side of each pair of squares, mark the diagonal using tailors chalk or another removable fabric pen.
Sew 1/4″ from either side of the line as below and cut along the marked line. Press the seams to the darker fabric. Do not trim!
Step 3
Make 40 Quarter-Square Triangles (QSTs) -
Using the HSTs you have just made, pair them up again. Take care to nest their seams neatly to give you lovely points!
On one side of each pair of HSTs, mark the opposite diagonal (you’ll have a big X across the square) and follow the HST instructions to make your QSTs.
Press the seams open and trim to 4” square.
Making the cushion panels
Front panel
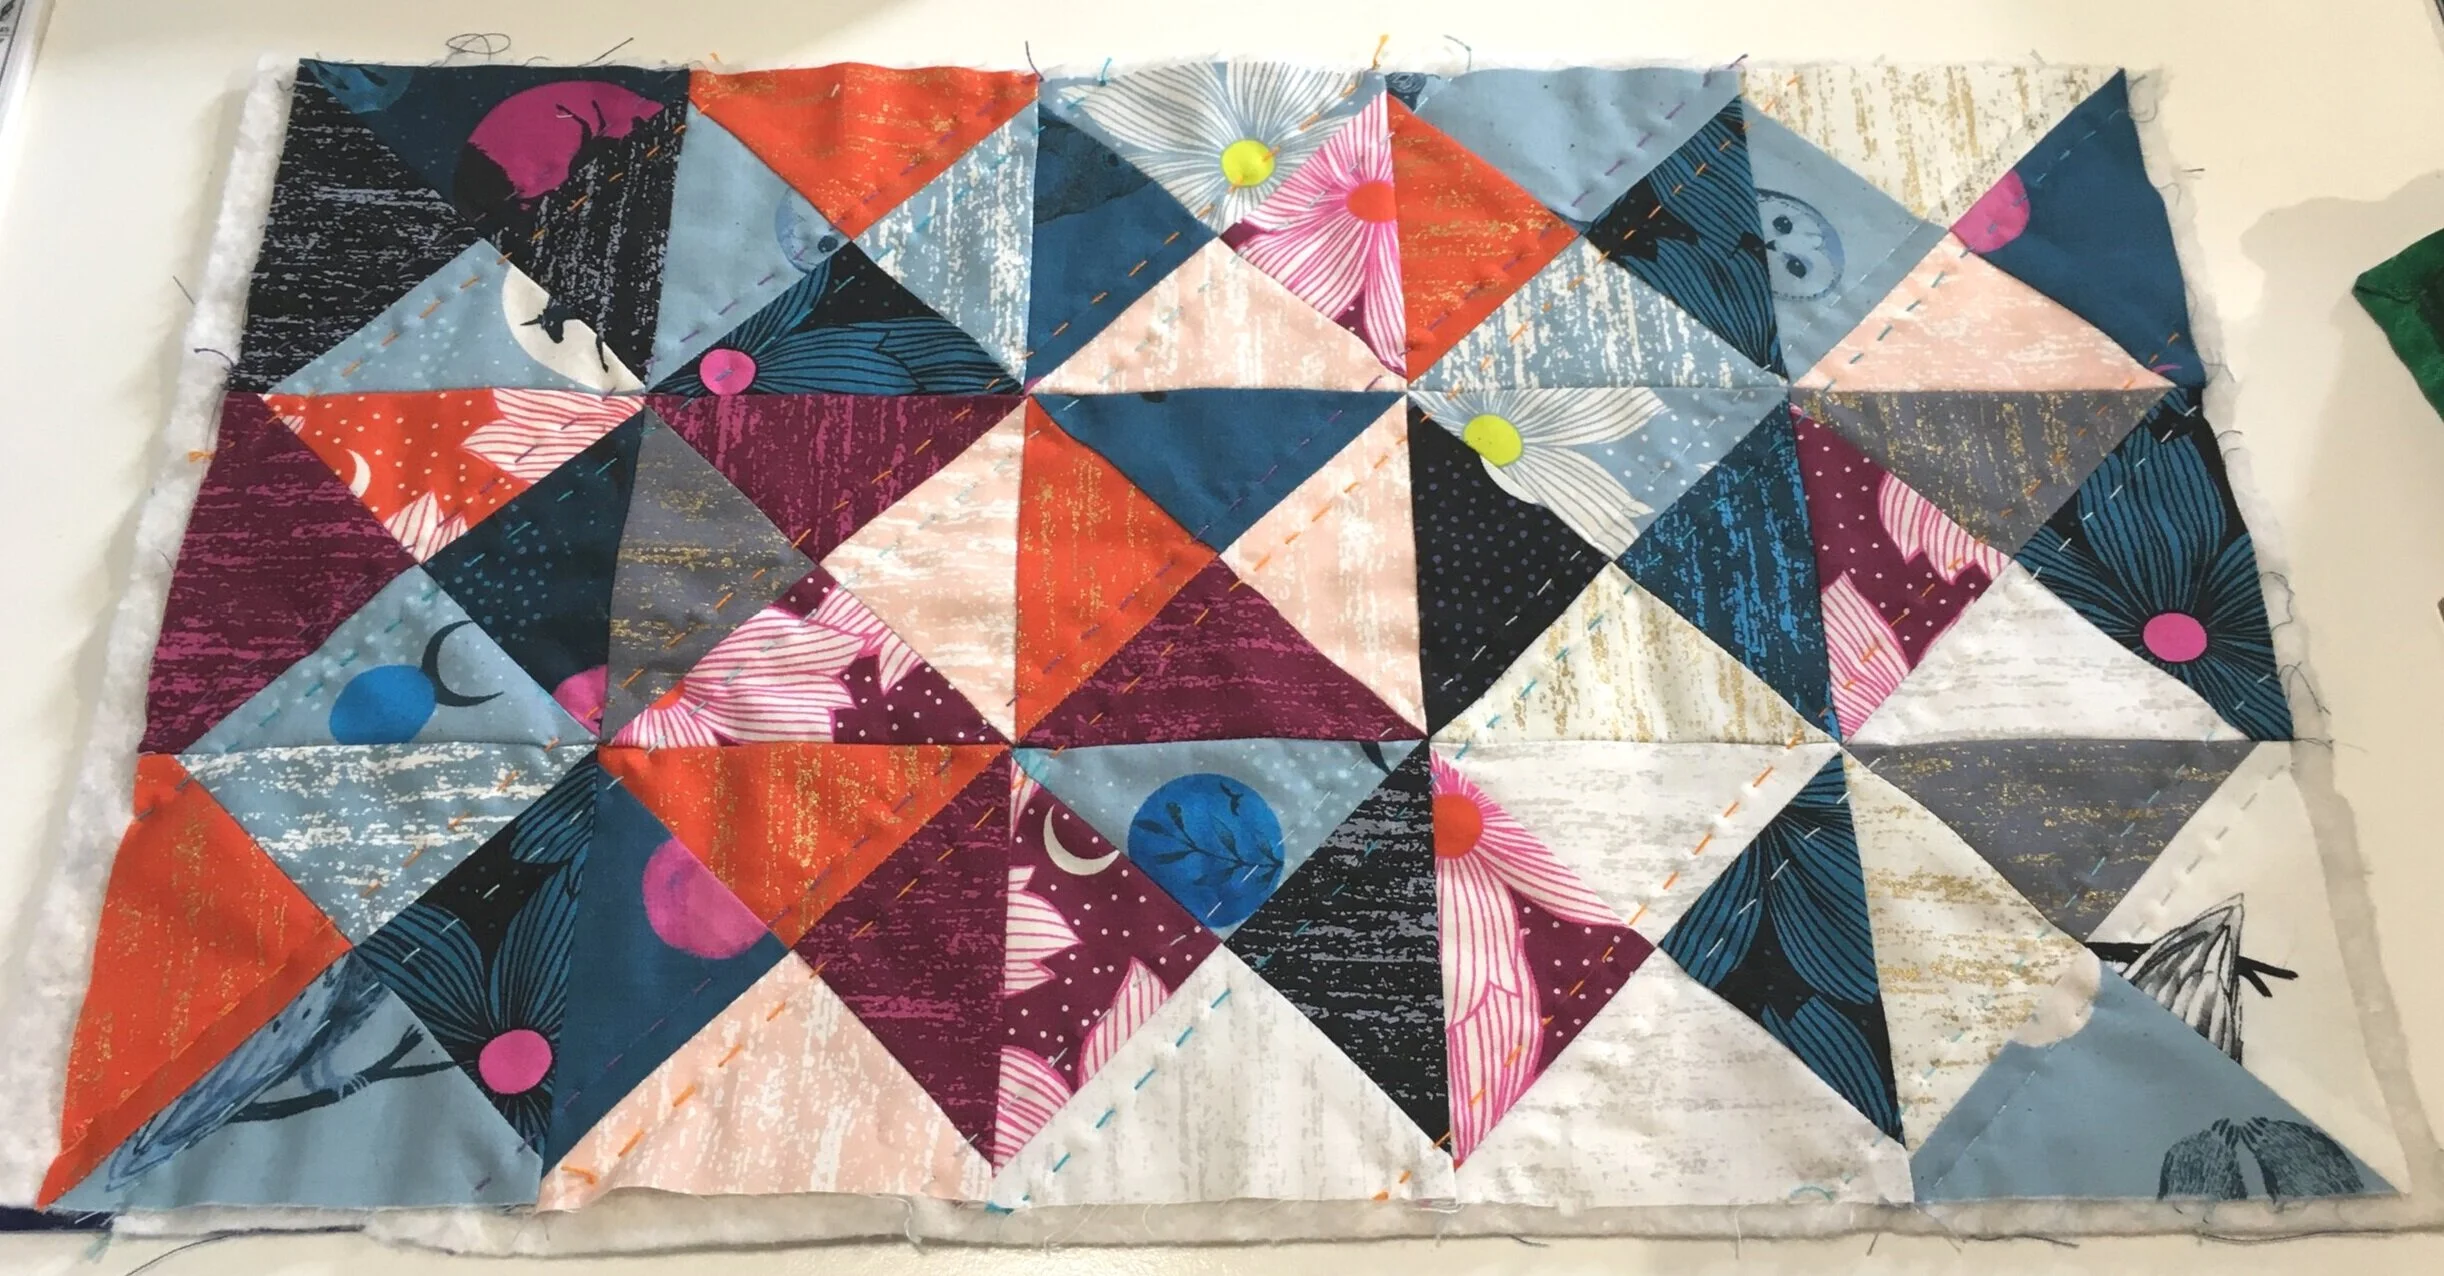
Sew five rows of five QSTs and press seams as shown -
Rows 1, 3 and 5 - press to the left
Rows 2 and 4 - press to the right
Sew the rows together, nesting your seams to give nice neat block joins. Press seams open.
Make a quilt sandwich with 20” x 20” lining and batting and quilt as desired. I made the most of suddenly having lots of spare time to do some straight line hand quilting. Trim to 17 1/2” x 17 1/2”.
Back panel one (top)
Sew three rows of five QSTs and press seams as shown -
Rows 1 and 3 - press to the left
Row 2 - press to the right
Sew the rows together, nesting your seams. Press seams open.
Make a quilt sandwich with 20” x 13” lining and batting and quilt as desired. Trim to 10 3/4” x 17 1/2”.
Bind or face the bottom edge using your preferred method. I went with facing because I just love the smooth transition it gives here!
Back panel two (bottom)
Make a quilt sandwich with 18” x 11” plain fabric, 20” x 13” lining and 20” x 13” batting and quilt as desired.
Bind or face the top edge using your preferred method. Trim to 10 3/4” x 17 1/2”.
Assembling the cushion
With right sides together, sew the front panel and back panel one (top) together along the top edge using a ¼” seam. Seam along the sides of the back panel, back-stitching over the bound edge to make it nice and secure.
With right sides together, sew the front panel and back panel two (bottom) together along the bottom edge using a ¼” seam. Seam along the sides of the back panel, back-stitching over the bound edge.
Turn the cushion right-sides out and press the seams carefully to give lovely crisp corners and edges.
And you’re done!
I love seeing your makes so share a picture using #charmedcushion and tag me on Instagram @caitlisledesigns or share them to my Facebook page @caitlisledesigns - whichever is your jam :)
Stay safe everyone x
Front view
Rear view
Have a play with different layouts before sewing the panels together


Finished cushion
If you don’t need another cushion cover, it makes an excellent sleeping bag for stuffed toys!